
My Honest Take After Installing a Few of These in 1.5 Ton Split ACs
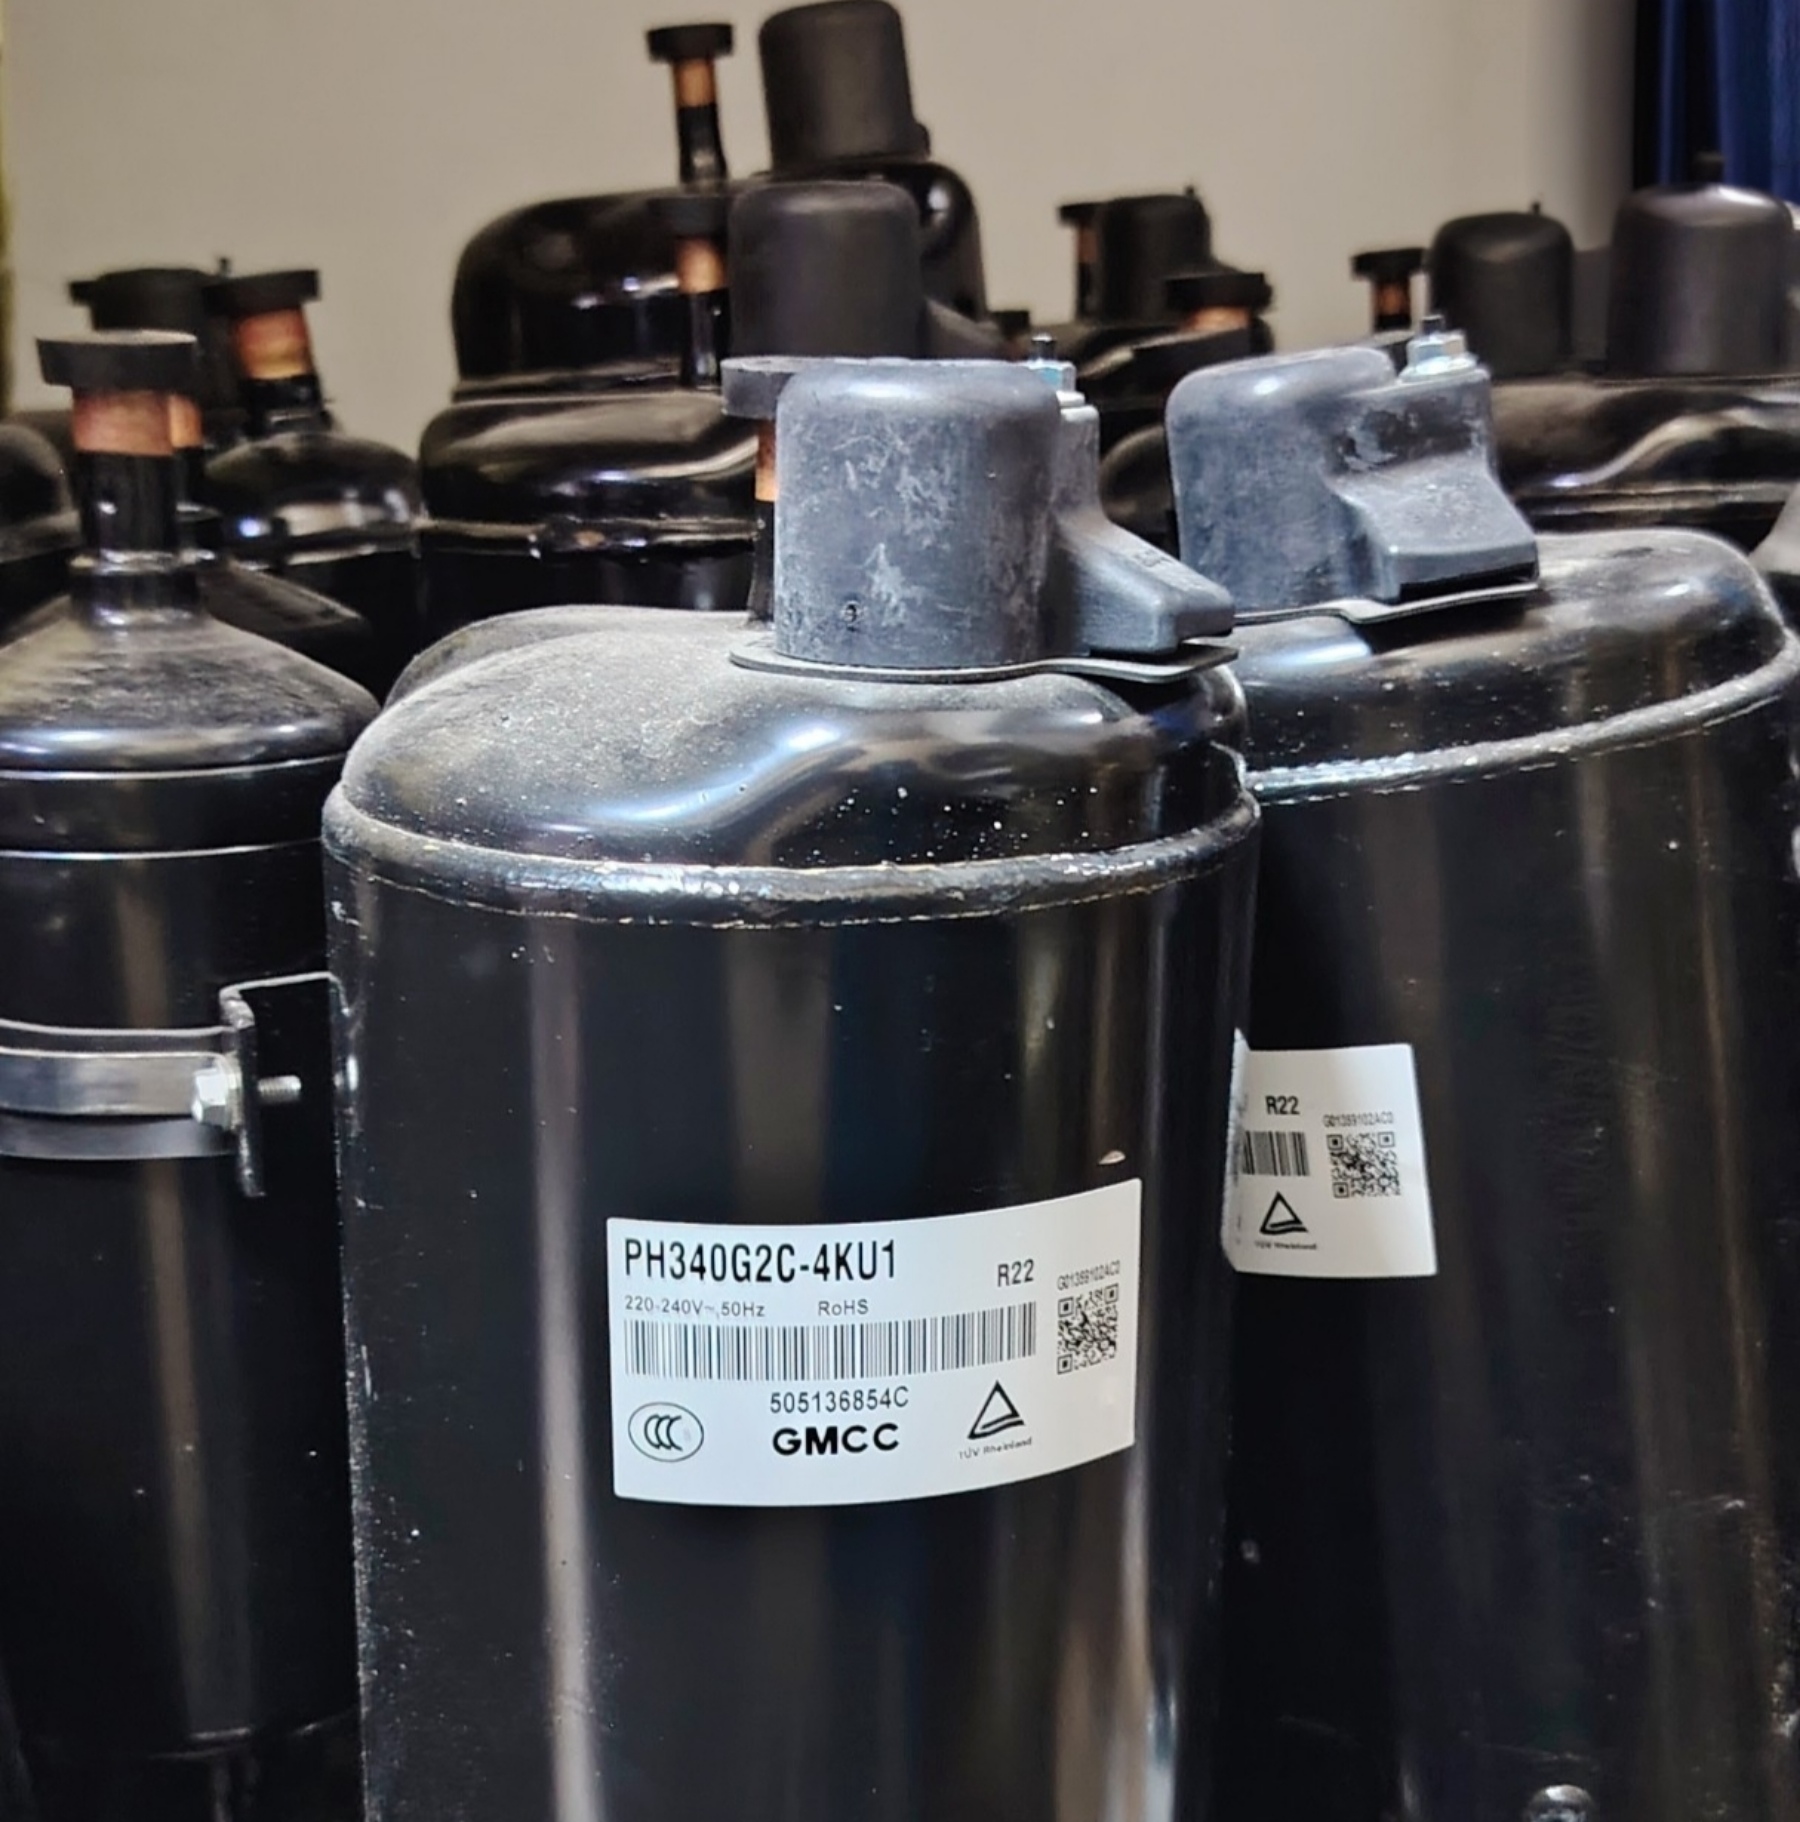
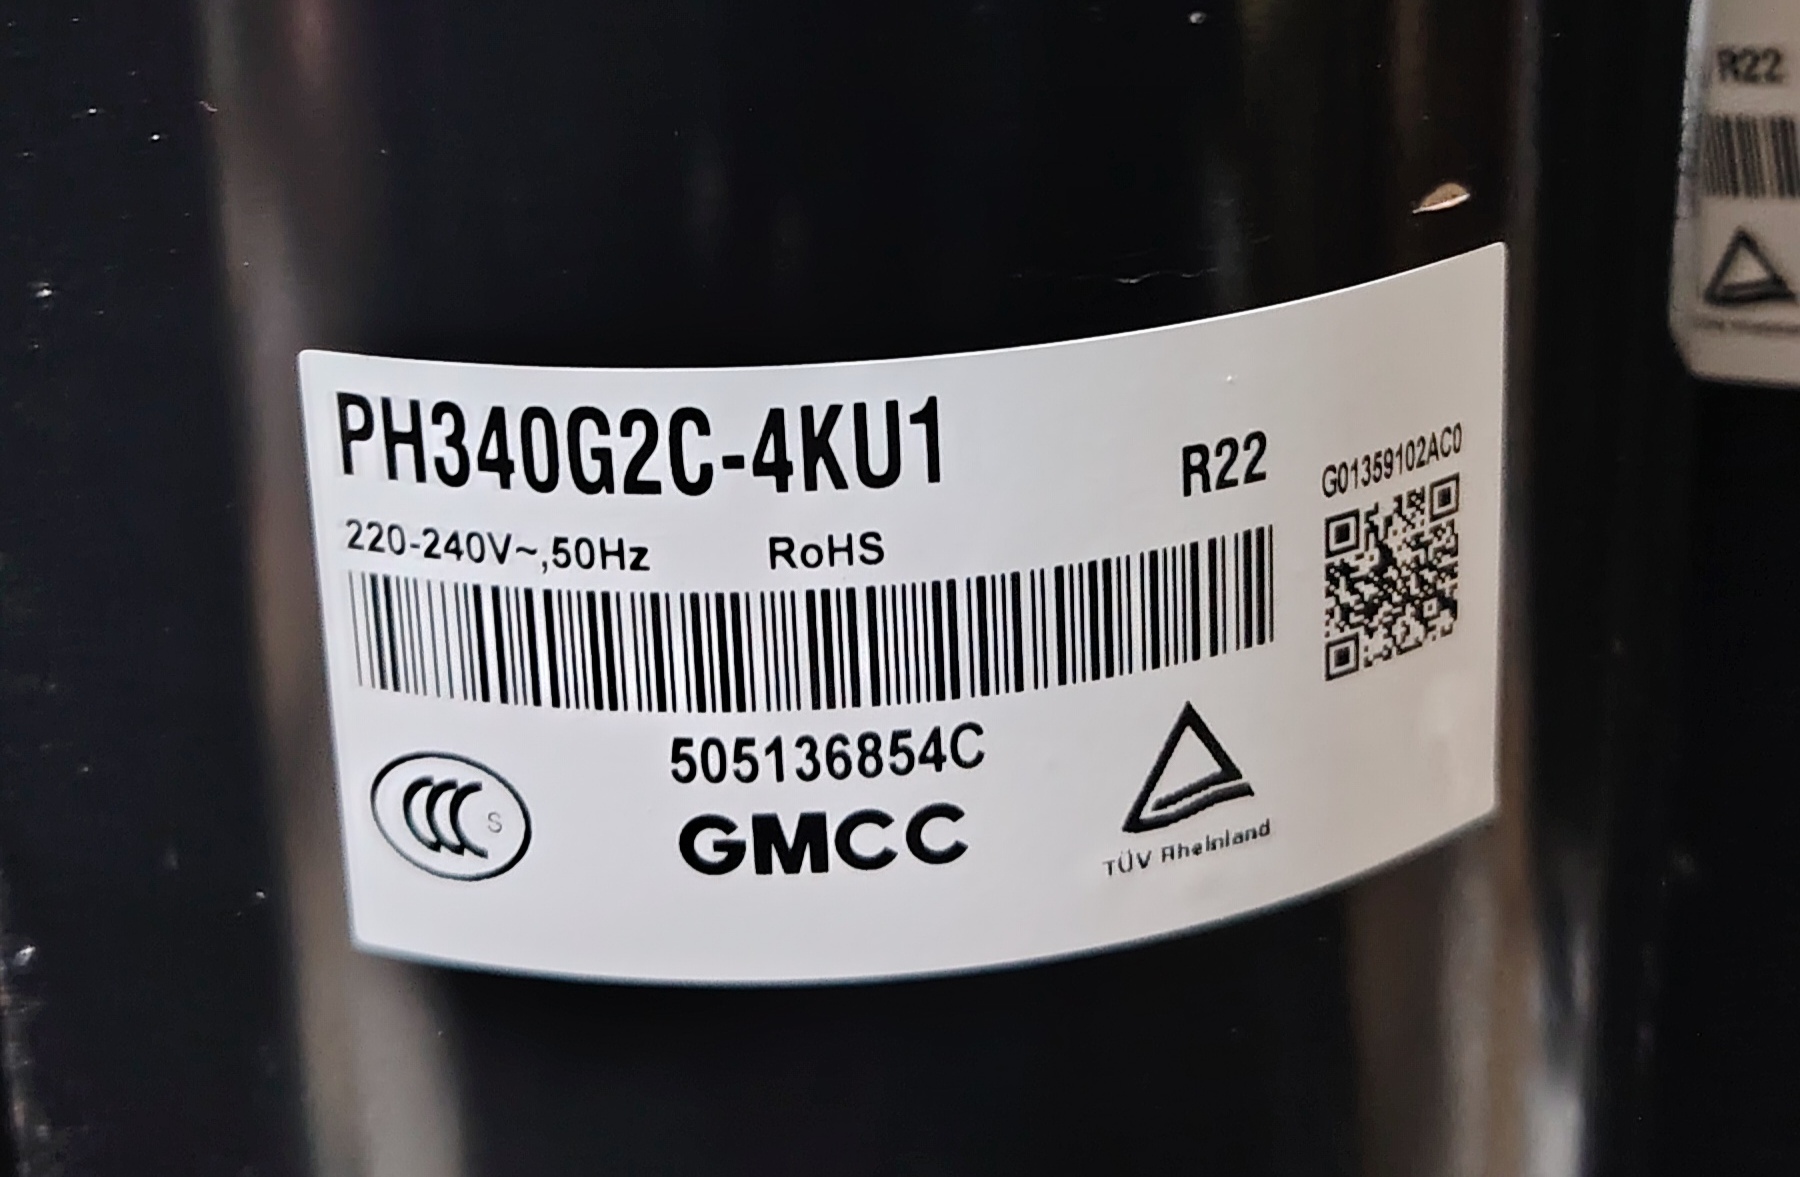
A customer once messaged me a photo of his outdoor AC unit with a caption that just said “why is this humming and doing nothing.” That hum turned out to be the classic sound of a compressor trying to start and failing the motor was energized, but it just couldn’t get the rotor moving. When we cracked it open, it was a GMCC PH340G2C-4KU1. And honestly, that was my first real hands-on experience with this particular model. PH340G2C-4KU1 GMCC 1.5Ton Compressor.
Since then I’ve installed and replaced a handful of these in 1.5 ton split AC units, and I’ve got some real opinions on it the good. The annoying, and a couple of things I wish someone had told me before my first job with this compressor.
First, What Are We Actually Talking About Here
The PH340G2C-4KU1 is a rotary compressor made by GMCC, mainly built for household split and window air conditioners in the 1.5 ton range. It runs on R22 refrigerant, single phase power at 220-240V/50Hz, which again tells you this is aimed at markets like the Middle East, Southeast Asia, Africa, and similar regions using that voltage standard.
Looking at the actual spec sheet, this compressor pulls around 1800W of power and puts out roughly 6000W of cooling capacity, which lands right around 20,000-21,000 BTU/h. That’s a pretty typical fit for a 1.5 ton AC, maybe stretching slightly into what some brands market as a “1.5 ton plus” unit depending on how conservatively they rate it.
It’s a single-stage rotary design, not a scroll or inverter type, so it runs at a fixed speed. It’s either fully on or fully off, no ramping up and down like the newer inverter compressors do.
Why I Got Called Out for This One
Going back to that job the compressor was humming instead of running because the start capacitor had failed. On non-inverter rotary compressors like this one. The capacitor is doing a lot of the work getting that rotor spinning at startup. Once it weakens, the compressor tries to start, draws a lot of current. And just sits there vibrating and buzzing without ever spinning up. If you let that go on for more than a few seconds repeatedly, you risk overheating the windings.
In this case we got lucky. The capacitor was the actual problem, not the compressor itself. So a $10 part saved us from a much bigger bill.
But I’ve also had two other jobs where the compressor really was dead one from years of low refrigerant nobody addressed. And one where the outdoor unit had. Basically never been cleaned and the condenser coil was so caked in dust the compressor was running hot constantly.
Step-by-Step: How I Diagnose These Before Assuming It’s Dead
If your outdoor unit with this compressor (or anything similar) is acting up, here’s roughly the order I check things in. Because jumping straight to “replace the compressor” is usually the expensive and wrong move.
Step 1: Listen first. A hum with no spin usually points to a capacitor or a stuck/seized compressor. A completely silent unit with no hum at all often points to a electrical supply issue or a tripped overload protector, not the compressor itself.
Step 2: Check the capacitor. Using a multimeter with capacitance mode, I test the run/start capacitor against its rated microfarad value printed on the casing. If it’s reading significantly lower than rated, that’s your problem, and replacing it is cheap and quick.
Step 3: Check for voltage at the compressor terminals. If the capacitor is fine, I check that the compressor is actually receiving proper voltage. Low voltage from a weak supply or long thin wiring runs can prevent the compressor from starting properly. And over time this stresses the motor.
Step 4: Test winding resistance. With power off, I check resistance between common, start, and run terminals. If one comes back open or shows a dead short, the compressor itself is done.
Step 5: Check refrigerant pressure. Low refrigerant pressure means the compressor may be running dry. Which causes overheating over time even if it hasn’t failed yet.
Step 6: Inspect the condenser coil and fan. A dirty coil or a weak/stuck condenser fan makes the compressor work far harder than it should, shortening its life significantly.
Only after going through all of that do I actually consider the compressor bad and move toward replacement.
The Actual Replacement Process
When the compressor genuinely needs replacing, here’s what that job looks like:
- Recover the existing refrigerant properly using a recovery machine — never vent R22 into the atmosphere.
- Cut the compressor free from the suction and discharge lines with a pipe cutter.
- Flush the copper lines to clear out any oil, debris, or acid, especially important if the old compressor burned out electrically.
- Position and mount the new PH340G2C-4KU1, checking the rubber isolation mounts are seated evenly to reduce vibration.
- Braze the suction and discharge lines back in while flowing nitrogen through the system to prevent internal oxidation.
- Replace the run capacitor as a matter of course, even if the old one tested okay it’s cheap insurance against another callback.
- Pressure test with nitrogen for a few hours to confirm there are no leaks.
- Pull a deep vacuum to remove air and moisture from the system.
- Recharge with the correct amount of R22, checking superheat and subcooling against the manufacturer’s specs rather than just going by pressure alone.
That last step is where I’ve seen a lot of techs go wrong charging by “feel” or by pressure gauge alone without checking superheat properly. Which either starves the compressor or floods it with liquid refrigerant. Both scenarios shorten the compressor’s life fast.
Mistakes Worth Avoiding
The biggest mistake I made early in my career, not specifically with this compressor but one that applies directly here, was assuming a humming compressor was automatically dead. I replaced a perfectly good compressor once because I skipped the capacitor test and jumped straight to condemnation. That was an expensive lesson in patience.
Another mistake I see constantly with these fixed-speed rotary compressors: people running the AC in extremely hot conditions with a dirty air filter and a blocked outdoor unit. Then wondering why the compressor died after only three or four years instead of the eight to ten it should reasonably last. This compressor isn’t an inverter type. So it doesn’t have the flexibility to ease off when conditions get tough it just keeps running at full load. Which means basic maintenance matters even more.
I’ve also seen people install a replacement compressor without changing the filter drier. On any compressor swap, especially after a burnout, skipping the filter drier replacement risks trapping moisture or acid in the system that slowly damages the new compressor.
Is It Worth Getting?
For a straightforward 1.5 ton R22 split AC repair, the PH340G2C-4KU1 has been reliable in my experience, assuming the rest of the system is healthy. It’s not fancy, it’s not inverter tech. But it does the job it’s designed for without much drama, and parts and replacements are still fairly easy to find through HVAC suppliers.
The one honest caveat, same as with most R22 compressors these days, is that R22 itself is being phased down in a lot of countries. If your unit is old enough to need this kind of compressor replacement. It’s worth having a conversation with your technician about whether it makes more sense long-term to move to a newer R32 or inverter system instead of continuing to repair an aging R22 unit.
Either way, if you do end up needing this compressor replaced, take the time to actually diagnose why it failed rather than just swapping the part and hoping for the best. That extra hour of testing is usually the difference between a repair that lasts years and one you’re doing all over again next season.