
What I Learned After Replacing One in a 2-Ton AC Unit
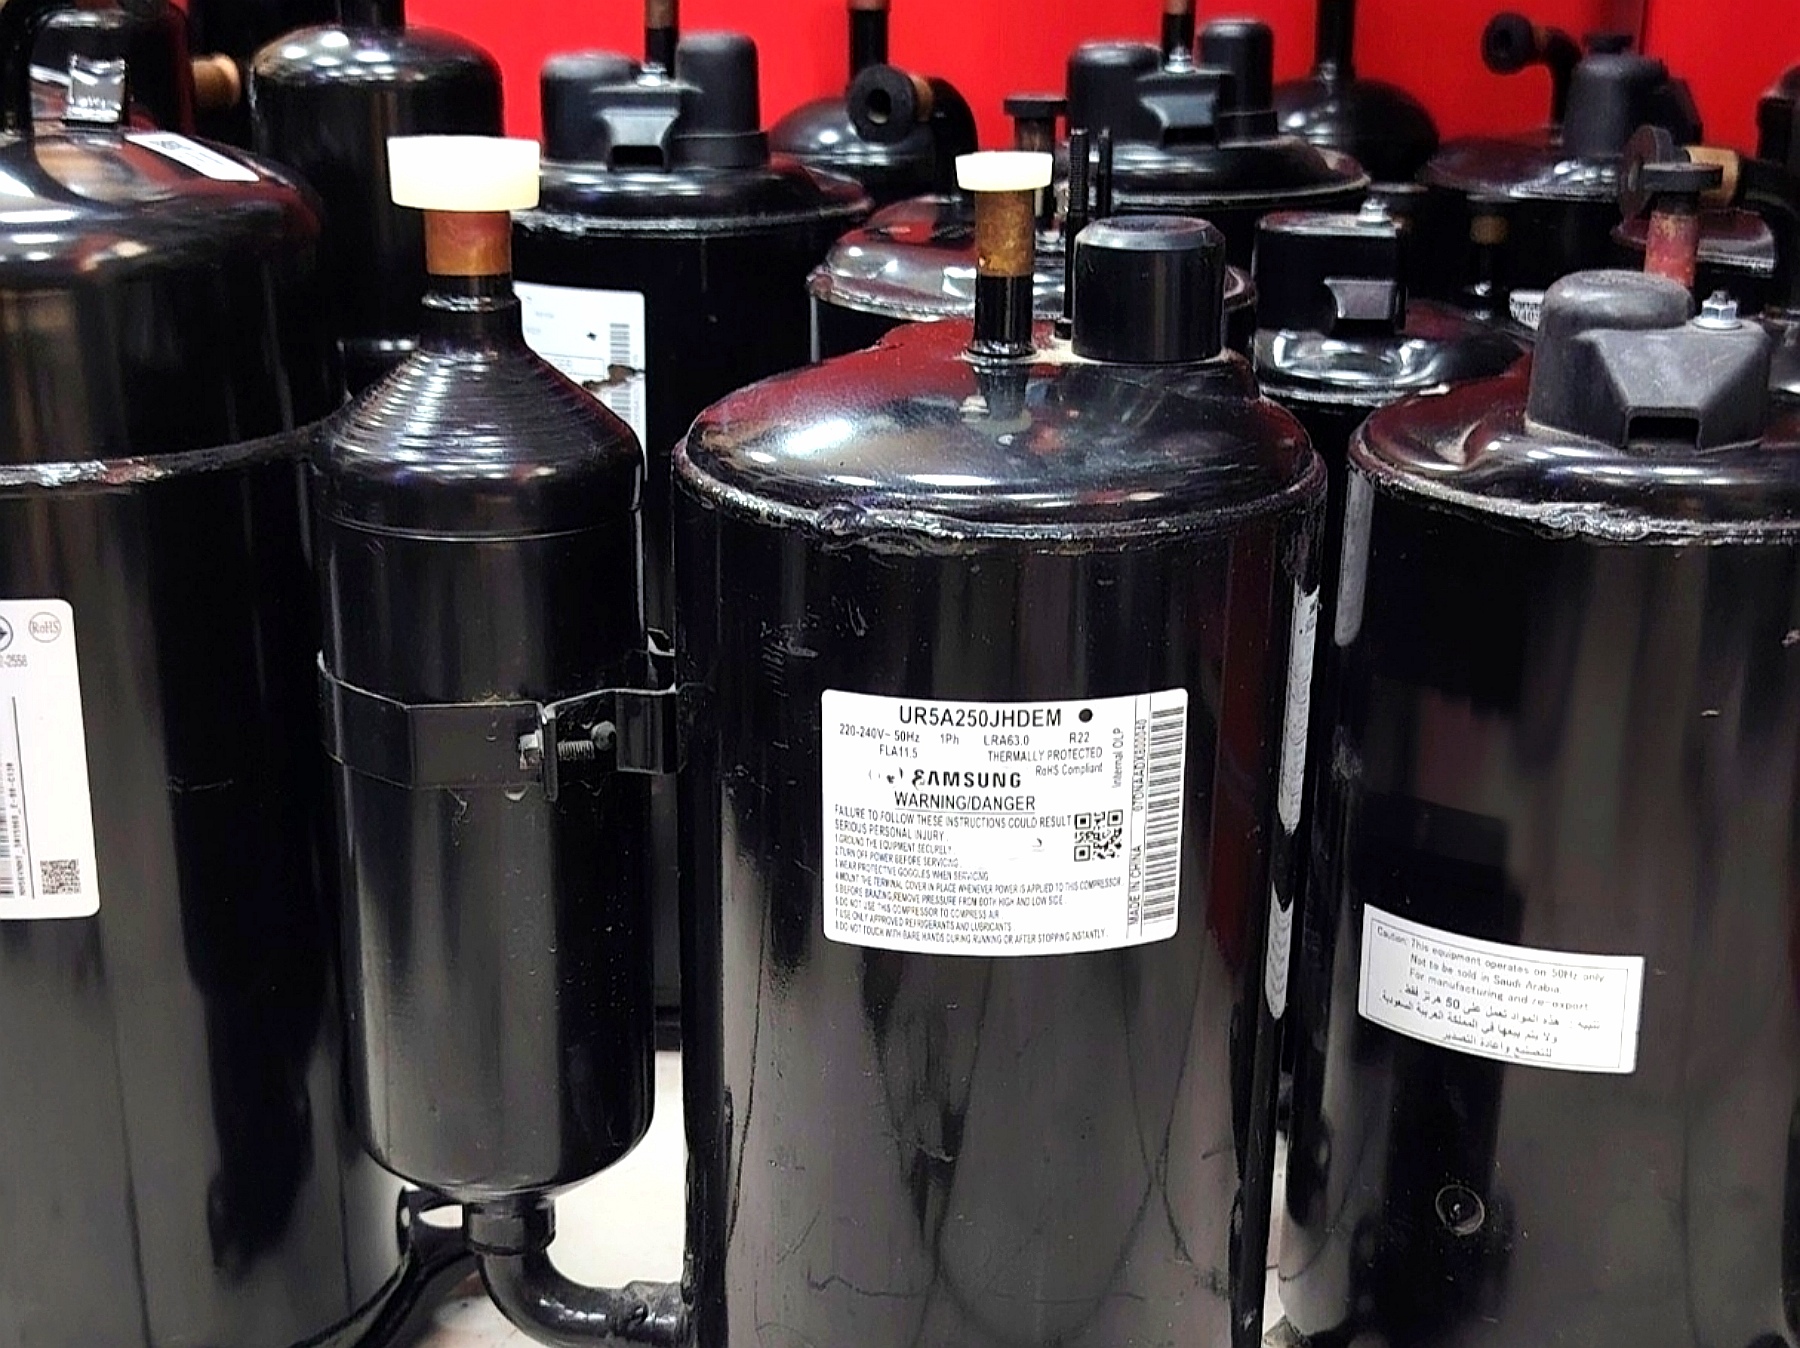
Last summer, a client called me at 7 AM because her split AC had gone completely silent overnight in the middle of a heatwave. Not the usual “it’s not cooling enough” complaint — the whole unit just stopped making noise, no cold air, nothing. When I pulled the cover off the outdoor unit, I found the compressor windings had burned out. The old compressor was a Samsung UR5A250JHDEM. And that job is basically what taught me everything I now know about this specific model. SAMSUNG Rotary Compressor UR5A250JHDEM.
If you’re reading this because you’ve got the same compressor tag staring back at you from a busted AC. Or you’re an HVAC guy trying to figure out if this part is worth ordering, I’m going to walk you through exactly what I found out. Both the good and the annoying parts.
So What Exactly Is This Compressor?
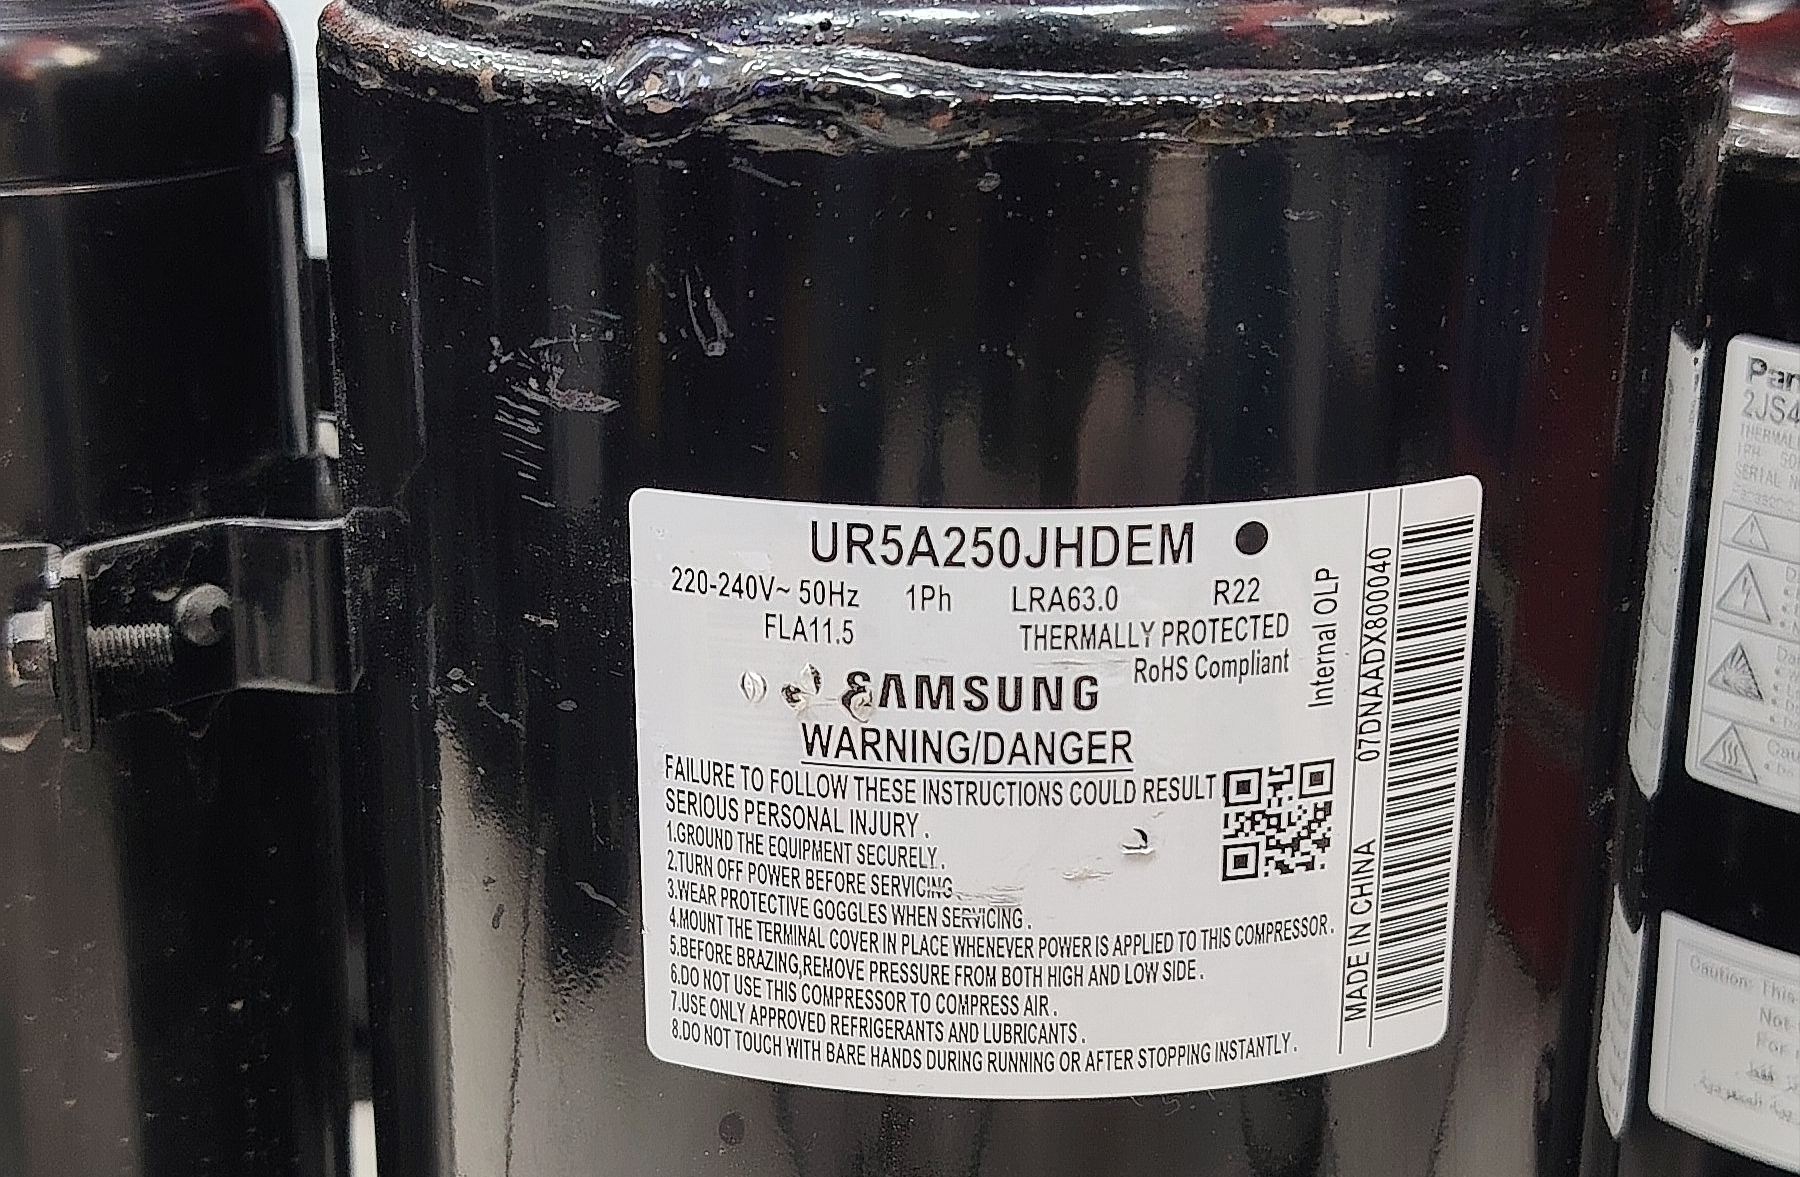
Samsung designed the UR5A250JHDEM as a rotary hermetic compressor for R22 refrigerant systems. It delivers around 24,000 to 25,000 BTU of cooling capacity, placing it in the 2-ton AC category. This compressor works well in large window air conditioners. And split AC units used in bedrooms, small offices, and retail shops.
It’s a rotary type, not scroll, which honestly matters more than people think. Rotary compressors are generally quieter and a bit more compact than scroll units of the same capacity. But they don’t always handle the same abuse over the long run, especially when the system has been low on gas for a while without anyone noticing.
Why I Ended Up Replacing One
Going back to that job — the compressor had died from what looked like a slow refrigerant leak that nobody caught for months. The client kept saying the AC was “just a little weak,” topped up gas twice without ever finding the actual leak. And eventually the compressor ran so hot and dry that the motor windings cooked.
This is honestly the most common way I see these compressors fail. It’s rarely the compressor’s fault on its own. It’s almost always:
- A slow leak that keeps starving the compressor of refrigerant
- Low voltage supply causing the motor to overheat
- Dirty condenser coils making the compressor work overtime
- Capacitor going bad and causing hard starts
By the time the compressor itself dies, it’s usually the last domino to fall, not the first.
What I Did, Step by Step
Here’s roughly how that replacement went, in case you’re planning to do something similar or just want to understand what a tech is actually doing when they quote you for a “compressor change.”
Step 1: Confirm it’s actually the compressor. I checked the windings with a multimeter — measuring resistance between the common, start, and run terminals. If you get infinite resistance (open circuit) or a dead short to the compressor body, that’s your answer. In this case, one winding was completely open.
Step 2: Recover the refrigerant. Never just cut the lines and let R22 vent into the air. Aside from being bad for the environment, it’s illegal in a lot of places now since R22 is being phased out. I used a recovery machine to pull whatever gas was left into a tank.
Step 3: Cut the compressor out. Using a pipe cutter (not a torch at first, to avoid oil catching fire from any residual gas). I removed the old UR5A250JHDEM from the suction and discharge lines.
Step 4: Flush the system. This step gets skipped by a lot of people trying to save time, and it’s a mistake. Burned-out compressors leave acid and debris in the copper lines. I flushed the lines with a proper refrigerant flush solvent to make sure none of that junk reached the new compressor.
Step 5: Braze in the new compressor. Positioned it, made sure the rubber mounts were seated properly (rotary compressors vibrate a bit more if they’re not sitting flat). Then brazed the suction and discharge lines using nitrogen flow to prevent oxidation inside the pipes.
Step 6: Pressure test. Filled the system with nitrogen and checked for leaks over a few hours before doing anything else. This step alone would’ve caught the client’s original leak months earlier if anyone had done it.
Step 7: Vacuum and recharge. Pulled a deep vacuum to remove moisture and air. Then charged with fresh R22 to the manufacturer’s spec, checking superheat and subcooling to make sure I wasn’t overcharging or undercharging.
The whole job took about four hours, most of which was the vacuum and pressure test waiting periods, not actual wrench time.
Mistakes I’ve Seen (and One I Made Myself)
Early on, I once reused an old capacitor because “it looked fine.” Rotary compressors like this one are actually pretty sensitive to capacitor mismatch — using the wrong microfarad rating or a worn-out capacitor puts extra strain on the start winding every single time it kicks on. That mistake cost me a callback two weeks later when the “new” compressor was struggling to start. Lesson learned: always replace the run capacitor with the compressor, don’t just trust the old one.
Another common mistake I see other techs make is skipping the nitrogen flow during brazing. Skipping it lets oxidation scale form inside the copper lines, which eventually breaks loose and clogs the expansion valve or filter drier. It’s a slow, sneaky failure that shows up weeks later and gets blamed on the new compressor when it’s actually a brazing shortcut.
And one more — don’t assume the replacement compressor needs to be an exact factory Samsung part every time. There are compatible rotary compressors from other brands with matching displacement and capacity. And sometimes they’re easier to source depending on your region. Just make sure the displacement (around 41.8 cc/rev for this model) and electrical specs actually match before swapping.
Is This Compressor Any Good?
Honestly, yes, with a caveat. In my experience, when these units fail, it’s rarely because the compressor was poorly built. Samsung’s rotary compressors have a decent reputation for being quiet and efficient for their size. The failures I’ve seen have almost always traced back to system-level issues — leaks, voltage problems, or neglect — rather than the compressor itself being a weak link.
The one thing worth knowing if you’re sourcing a replacement: since it’s an R22 unit, and R22 production has been winding down in a lot of countries, availability of both the compressor and the refrigerant itself is getting tighter every year. If your system is already old enough to need a compressor swap, it might be worth having an honest conversation with your technician about whether it makes more financial sense to just upgrade to a newer R32 or R410A unit instead of sinking money into keeping an R22 system alive.
Final Thoughts
If you’ve landed on this page because your AC just died and you spotted “UR5A250JHDEM” on a sticker somewhere, the good news is this is a solid, fairly well-documented compressor that most experienced refrigeration techs will recognize immediately. The bad news is that if it failed, there’s usually an underlying reason, and just swapping the compressor without figuring out why it died in the first place is how you end up doing this same job again in six months.
Get the leak found, get the electrical checked, and don’t let anyone skip the vacuum and pressure test steps just to save an hour. That patience is really what separates a repair that lasts five years from one that fails again by next summer.